- July 30, 2017
- Posted by: SmallBusiness
- Category: QuickBooks Online
It’s perhaps one of your favorite activities in QuickBooks Online: recording money that comes in. Are you doing it right?
Your days of matching paper checks to paper invoices are over. QuickBooks Online excels at keeping your accounts receivable organized. No more digging through piles of forms and hand-stamping PAID on your customer bills and statements. No more trying to write small enough in your register so you can identify the origins of deposits.
You do, though, need to know how to get to payment screens—there are multiple ways—and which form to complete for each remittance. Here are the three types you’ll deal with most often.
Receive payment on an invoice
When payment comes in on an invoice, you can get to the right screens in any of several ways.
Click the + (plus) sign in the upper right corner. Under Customers, select Receive Payment. In the upper left of the window that opens, select the correct customer by clicking the down arrow at the end of that field to open the list
Make sure the Payment date is correct. Open the Payment method list and select from Cash, Check, Credit card, etc. If there’s a Reference no., like a check number, enter it in that field. The default value for Deposit to is Undeposited Funds. Leave that active, and enter the Amount received in that field.

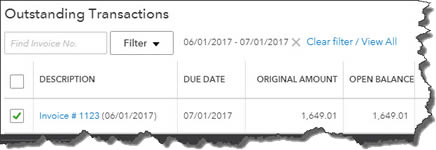
If the customer has multiple outstanding invoices, QuickBooks Online will put a check mark in front of the oldest one(s). You can change this if you need to by clicking to uncheck the box and clicking in the box in front of the correct one.
Tip: If you want to isolate invoices from a specific date range, click the arrow next to Filter.
When you’ve specified where the payment(s) will go, add a memo and/or attachment if you’d like and select either Save and close or Save and new in the lower right corner.
You can also record payments on invoices from other screens in QuickBooks Online. For example, click Transactions in the left vertical navigation bar and select Sales to open the list of sales transactions. At the far right end of every line that contains an unpaid invoice, you’ll see a link to Receive payment. Click it, and the payment screen will open with the name and amount already filled in. Another option: With an invoice open, click Receive payment in the upper right corner.
Receive payment at the time of the sale
When a customer pays you immediately for products and/or services, there’s no need to create an invoice. You’d instead use a sales receipt. Click the + sign in the upper right and select Sales Receipt under Customers.
Tip: If you click the small diagonal arrow when it appears next to an option, the site will open the screen in a separate window.
Fill in the fields at the top like you did on the Receive Payments screen.

Complete the lower half of the sales receipt by selecting the products and/or services sold from the drop-down lists. Then click the links at the bottom of the screen to print or email the receipt.
Receive a down payment or retainer
If a customer gives you money as part of a down payment or a retainer for work to be done or products to be delivered, you can enter it on the Receive Payment screen without connecting it to an invoice. If you’re prepared to create a record of the specific charges, though, you can use an invoice form and categorize the payment as a deposit.
There are other ways to receive payments from customers in QuickBooks Online, like creating credit memos or using a mobile payment device. However you do it, your bookkeeping needs to be precise, or you’ll run into problems down the road. If this is a topic that creates some uncertainty, we can go over the whole concept with you and outline your options. You work too hard for your money to risk applying it incorrectly –or worse, losing it to an accounting error.
